Rotablator: Difference between revisions
From Bay Area Structural Heart Wiki
No edit summary |
No edit summary |
||
| (9 intermediate revisions by 2 users not shown) | |||
| Line 8: | Line 8: | ||
[https://youtu.be/Zmuvh2fGHnM Setup Video] | [https://youtu.be/Zmuvh2fGHnM Setup Video] | ||
The RotaPro is kept behind Room 6. You need the IV pole with the device, the nitrogen tank, and the appropriate burr. | The RotaPro is kept behind Room 6. You need the IV pole with the device, the nitrogen tank, rotaglide in pressurized 1000ml hep saline, 108” tubing, and the appropriate burr. | ||
Open the burr for the scrub person to setup. | Open the burr and tubing for the scrub person to setup. | ||
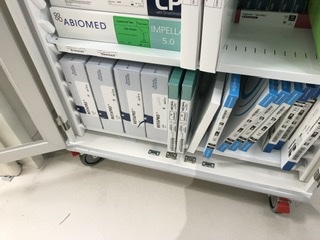
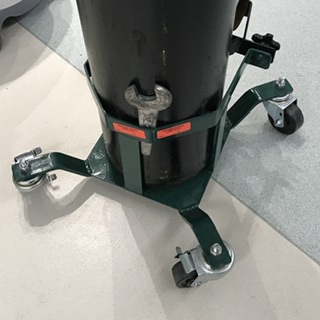
[[File:RotaLocation.jpg|thumb|150px|right|Rota Burr Location|link={{filepath:RotaLocation.jpg}}]] | |||
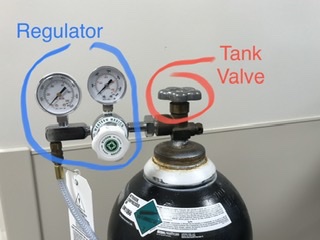
[[File:RotaTank1.jpg|thumb|150px|right|Rota tank valves|link={{filepath:RotaTank1.jpg}}]] | |||
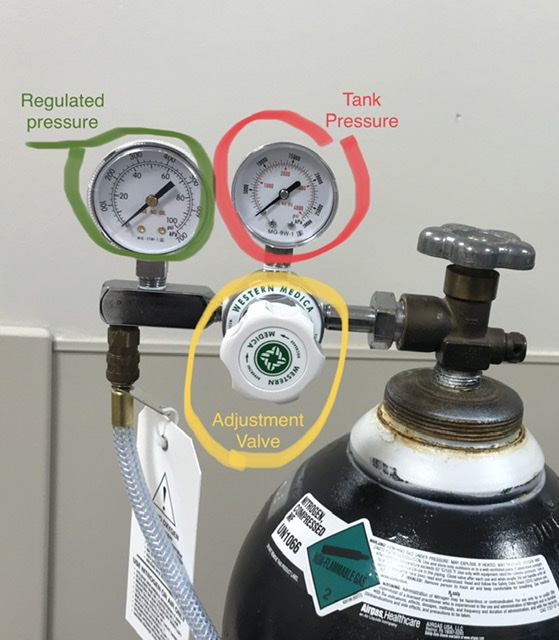
[[File:RotaTankDetail.jpg|thumb|150px|right|Rota tank valve detail|link={{filepath:RotaTankDetail.jpg}}]] | |||
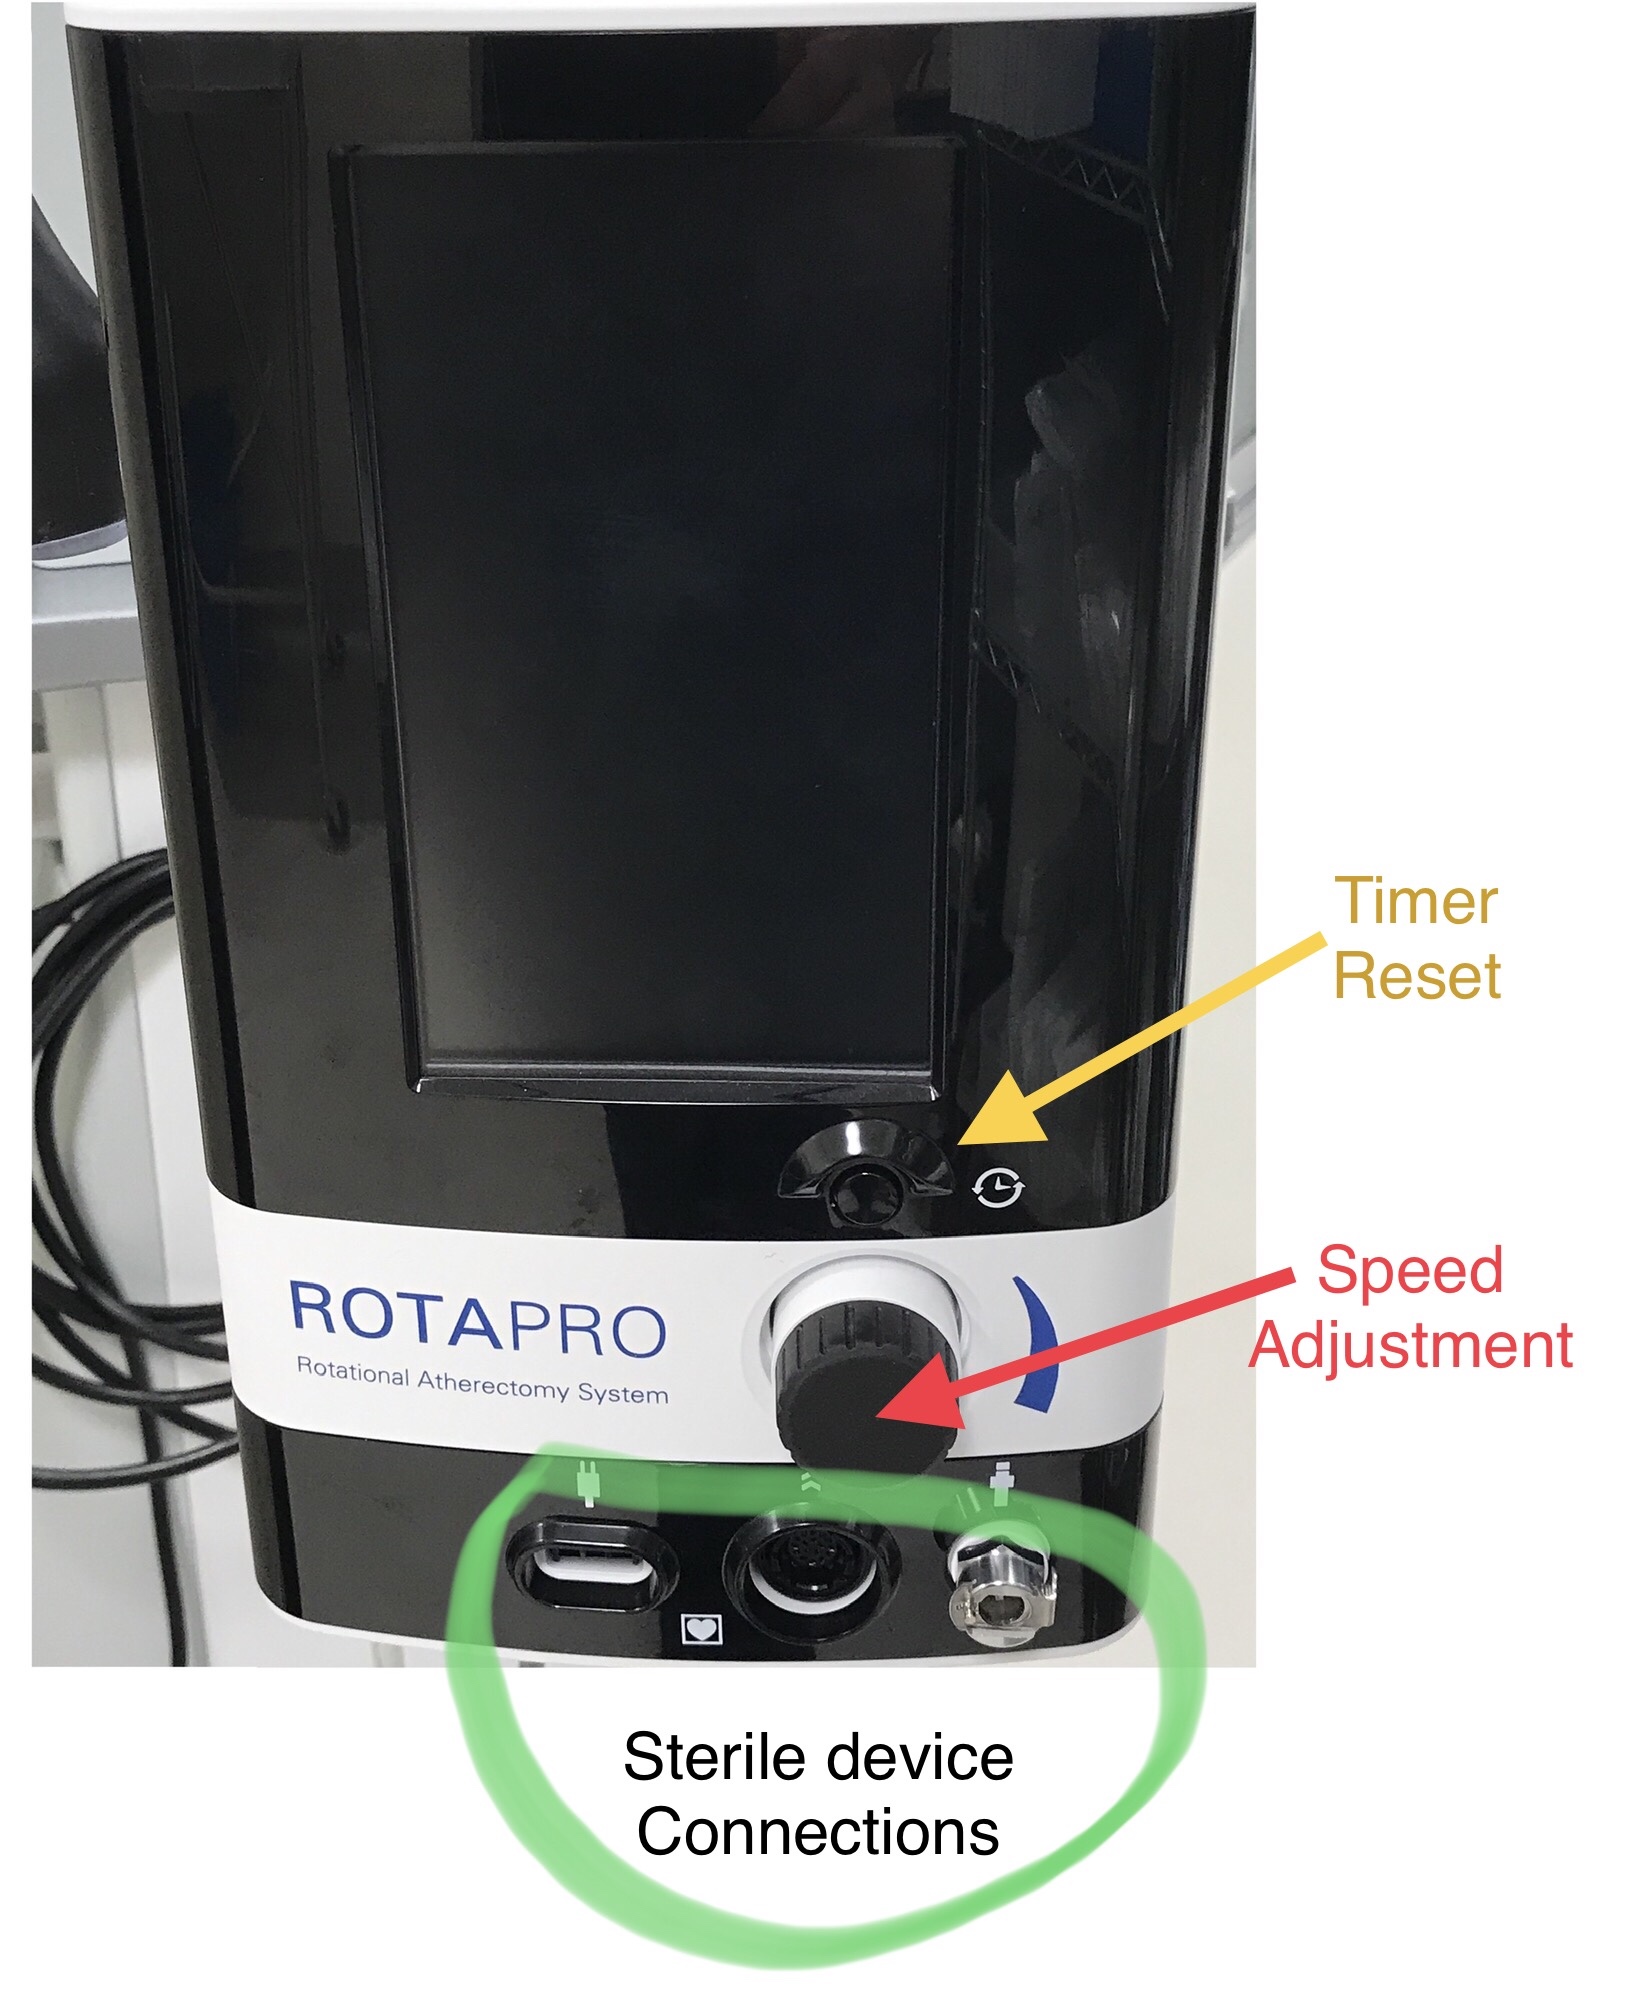
[[File:RotaConsole.jpg|thumb|150px|right|RotaPro Console|link={{filepath:RotaConsole.jpg}}]] | |||
[[File:TankWrench.jpg|thumb|150px|right|Tank Wrench Location|link={{filepath:TankWrench.jpg}}]] | |||
===Circulator=== | ===Circulator=== | ||
#Attach air hose to back of device. | #Attach air hose to back of device. | ||
#Open nitrogen tank valve. | #Open nitrogen tank valve. | ||
#Note tank pressure. (If below 1000, consider replacement) | #Note tank pressure. (If below 1000, consider replacement) | ||
# | #*BSC guidelines are minimum of 500 psi for starting a case! | ||
#If necessary, adjust regulator to appropriate pressure range (90-110 psi) using adjustment valve. | |||
#*Adjust slowly using arrows on knob as a guide. | |||
#*Pressure will not go down as you turn it down unless you vent the hose. | |||
#*Vent hose by partially removing it from regulator. | |||
#*If pressure isn’t increasing, check the tank valve. | |||
#Plug in power cord to console | |||
#*If it’s not turning on, check main power switch on back. | |||
#Connect umbilical from sterile device to front. | |||
#Use front pressure knob to adjust speed to MD’s desired range. | |||
===Scrub=== | |||
#Turn package on its lid and open on table. (The lid is useful as a fluid container) | |||
#Pass off umbilical to circulator. | |||
#Pass off IV spike for tubing. (Keep roller clamp) | |||
#Attach tubing to short tubing piece on device. | |||
#Once Rotaglide is flowing, release and slide advancer to exercise it and clear bubbles. | |||
#Lock advancer ~2 cm from fully retracted. | |||
#Load on wire. | |||
#Once wire is out the back, place clip on end of wire. | |||
#Observe rotaglide fluid is flowing from tip of device. | |||
#Activate device outside the body when physician is ready to test and adjust speed | |||
#*Blue button on advancer is a toggle for activating. Push once for on. Push again for off. Do not hold. | |||
#Rotablate! | |||
#When ready to remove, depress 2 black buttons at 12 and 6 on back of device to activate dynaglide. | |||
===Breakdown=== | |||
#Disconnect sterile device umbilical. | |||
#Unplug power. | |||
#'''Close main tank valve''' | |||
#Carefully unplug air hose from console. | |||
===General Notes=== | |||
*'''Ensure tank valve is closed!''' | |||
*Tank wrench is located on base of tank. | |||
<br /> | <br /> | ||
[[Category: | [[Category:Products]] | ||
Latest revision as of 20:11, 8 April 2020
aka RotaPro
Manufacturer: Boston Scientific
Product website: BSC RotaPro
Setup
The RotaPro is kept behind Room 6. You need the IV pole with the device, the nitrogen tank, rotaglide in pressurized 1000ml hep saline, 108” tubing, and the appropriate burr.
Open the burr and tubing for the scrub person to setup.
Circulator
- Attach air hose to back of device.
- Open nitrogen tank valve.
- Note tank pressure. (If below 1000, consider replacement)
- BSC guidelines are minimum of 500 psi for starting a case!
- If necessary, adjust regulator to appropriate pressure range (90-110 psi) using adjustment valve.
- Adjust slowly using arrows on knob as a guide.
- Pressure will not go down as you turn it down unless you vent the hose.
- Vent hose by partially removing it from regulator.
- If pressure isn’t increasing, check the tank valve.
- Plug in power cord to console
- If it’s not turning on, check main power switch on back.
- Connect umbilical from sterile device to front.
- Use front pressure knob to adjust speed to MD’s desired range.
Scrub
- Turn package on its lid and open on table. (The lid is useful as a fluid container)
- Pass off umbilical to circulator.
- Pass off IV spike for tubing. (Keep roller clamp)
- Attach tubing to short tubing piece on device.
- Once Rotaglide is flowing, release and slide advancer to exercise it and clear bubbles.
- Lock advancer ~2 cm from fully retracted.
- Load on wire.
- Once wire is out the back, place clip on end of wire.
- Observe rotaglide fluid is flowing from tip of device.
- Activate device outside the body when physician is ready to test and adjust speed
- Blue button on advancer is a toggle for activating. Push once for on. Push again for off. Do not hold.
- Rotablate!
- When ready to remove, depress 2 black buttons at 12 and 6 on back of device to activate dynaglide.
Breakdown
- Disconnect sterile device umbilical.
- Unplug power.
- Close main tank valve
- Carefully unplug air hose from console.
General Notes
- Ensure tank valve is closed!
- Tank wrench is located on base of tank.