Rotablator: Difference between revisions
From Bay Area Structural Heart Wiki
No edit summary |
No edit summary |
||
| Line 11: | Line 11: | ||
Open the burr for the scrub person to setup. | Open the burr for the scrub person to setup. | ||
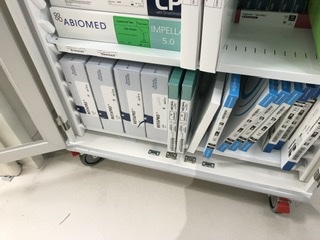
[[File:RotaLocation.jpg|thumb|150px|right|Rota Burr Location|link={{filepath:RotaLocation.jpg}}]] | |||
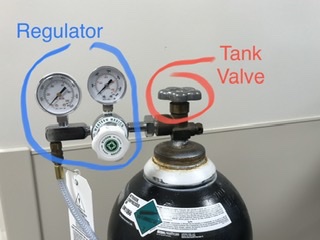
[[File:RotaTank1.jpg|thumb|150px|right|Rota tank valves|link={{filepath:RotaTank1.jpg}}]] | |||
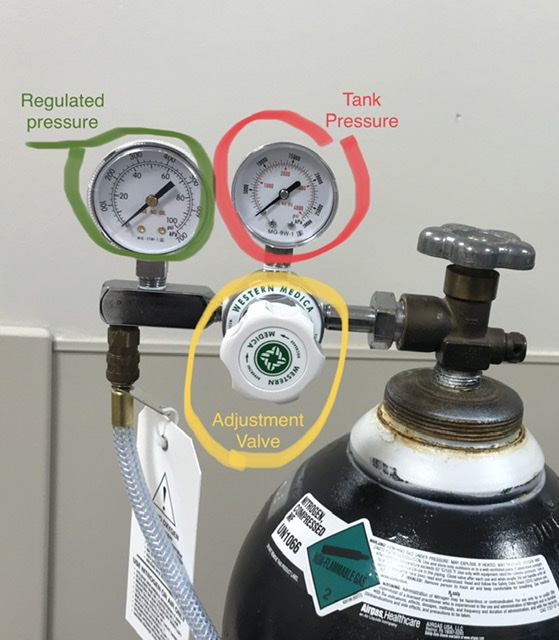
[[File:RotaTankDetail.jpg|thumb|150px|right|Rota tank valve detail|link={{filepath:RotaTankDetail.jpg}}]] | |||
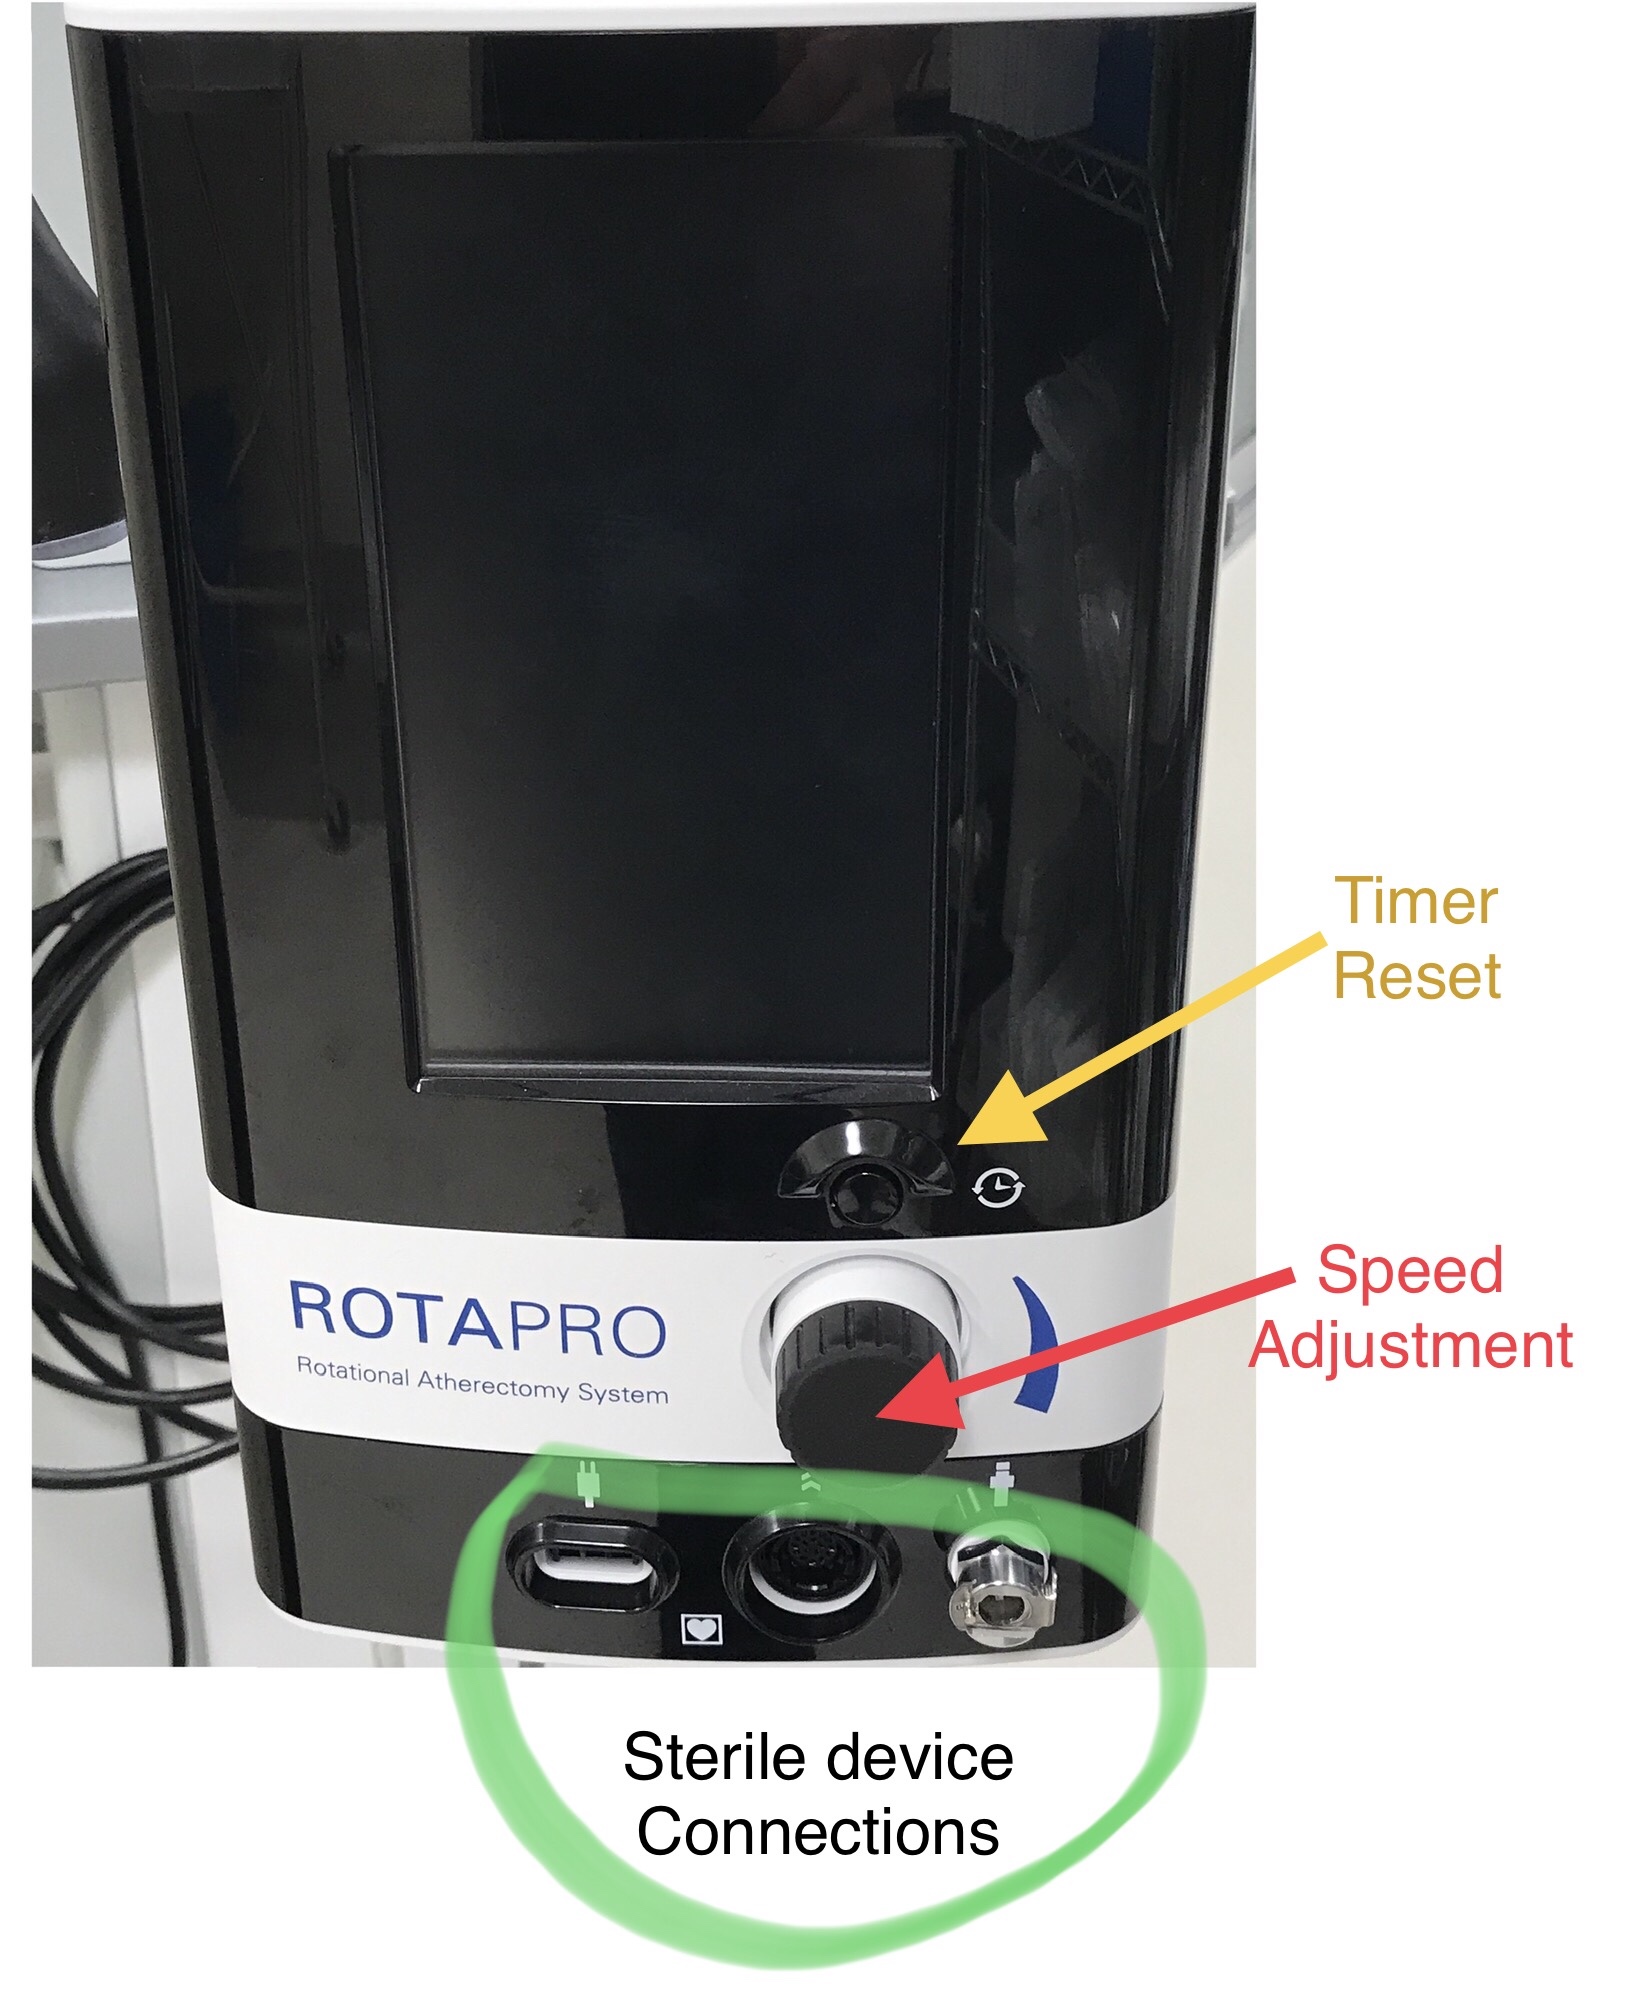
[[File:RotaConsole.jpg|thumb|150px|right|RotaPro Console|link={{filepath:RotaConsole.jpg}}]] | |||
===Circulator=== | ===Circulator=== | ||
Revision as of 17:49, 7 April 2020
aka RotaPro
Manufacturer: Boston Scientific
Product website: BSC RotaPro
Setup
The RotaPro is kept behind Room 6. You need the IV pole with the device, the nitrogen tank, and the appropriate burr.
Open the burr for the scrub person to setup.
Circulator
- Attach air hose to back of device.
- Open nitrogen tank valve.
- Note tank pressure. (If below 1000, consider replacement)
- Adjust regulator to appropriate pressure range (90-110 psi) using adjustment valve.
- Adjust slowly using arrows on knob as a guide.
- Pressure will not go down as you turn it down unless you vent the hose.
- Vent hose by partially removing it from regulator.
- If pressure isn’t increasing, check the tank valve.
- Plug in power cord to device
- If it’s not turning on, check main power switch on back.
- Connect umbilical from sterile device to front.
- Use front pressure knob to adjust speed to MD’s desired range.